Steam 1.0 · Tactical Meta Loadouts & AP Execution

Quasimorph Best Builds Guide: 1.0 Meta Loadouts, AP Rotations & Synergies

Surviving the unforgiving solar system in Quasimorph 1.0 requires moving beyond random equipment scavenged from corpses. By aligning operative traits, class perk trees, body implant modifications, and ammunition ballistics into tightly engineered meta builds, you can dictate the flow of combat. Master the four definitive loadout archetypes, exact Action Point rotations, and emergency recovery tactics.

Off-Screen Ballistic Supremacy

Build 1: The Hallway Eraser (Long-Range Sniper)

The premier build for eliminating elite corporate mercenaries, automated security turrets, and heavily armed snipers before they can ever calculate a firing solution.

CORE SPECIFICATION

Operative & Loadout Blueprint

  • Operative: Victoria “Spear” Boudicca (+2 Weapon Range, -2 Enemy Reaction Detection, 2-Turn Fixed Buff).
  • Class: Scouts of Hades (Sneak Speed & Critical Multipliers) or Angel of Spades (Armor Penetration & Headshots).
  • Key Implant: Eye of Rarrug (Cranial implant providing 8-tile X-ray vision through solid bulkheads and steel doors).
  • Primary Weapon: Buffalo DMR (7.97mm) or Pocket Artillery (7.97mm AP) / Archbishop Marksman Rifle.
  • Secondary Weapon: Suppressed MP-50 SMG or Monomolecular Vibrating Dagger for emergency close-quarters defense.
  • Armor Configuration: Medium Infiltration Camo Suit (<10kg total weight) to preserve base mobility.
ACTION POINT ROTATION

Standard Combat Engagement Cycle

  1. Step 1 (Stance & Target Acquisition): Drop into Sneak stance (-40% scatter cone, +critical multiplier). Use Eye of Rarrug to scan adjacent corridors through closed blast doors.
  2. Step 2 (Off-Screen Line of Sight): Acquire enemy patrol silhouettes at 12 to 14 tiles distance. Victoria's +2 range pushes sniper vision beyond standard AI detection limits.
  3. Step 3 (The Two-Tap Execution): Spend 1 AP to Aim (tightening accuracy to 95%+), then 1 AP to Fire high-velocity 7.97mm AP ammunition into the target's head.
  4. Step 4 (Reaction Suppression): Because the target has a -2 reaction detection penalty and cannot see past 10 tiles, zero counter-sniper fire is triggered.

Failure Recovery & Contingency Protocol

If hostile reinforcements rush your position from a blind flank or elevator shaft:

  • Do not attempt to snipe at point-blank range: Long rifles suffer severe accuracy scatter penalties when fired at adjacent tiles.
  • Drop a Smoke Grenade (1 AP): Obscures line of sight and breaks enemy targeting lock.
  • Swap to Drawn Sidearm (1 AP): Draw your suppressed SMG or blade rather than reloading the rifle.
  • Retreat 4 to 5 Tiles: Fall back through a doorway, right-click to close the door, and reset your standoff distance.

Unstoppable Close-Quarters Shock Unit

Build 2: The Immortal Juggernaut (Stun-Proof Breacher)

Designed to conquer 5-skull planetary defense contracts, enclosed corporate research complexes, and heavily fortified asteroid vaults.

CORE SPECIFICATION

Operative & Loadout Blueprint

  • Operative: Maximilian “Max” Rohr (*Feel No Pain* — 100% pain shock stun immunity, -50% incoming critical damage).
  • Class: Tunnel Rats (Shotgun Scatter Reduction & Knockback) or Golem Group (Physical Resistance Stacking).
  • Key Implants: Blood Filtration (Stomach/Torso — complete immunity to chemical addiction and toxic overdose) + Subdermal Plating.
  • Primary Weapon: Taiga-24 Automatic Drum Shotgun (12-Gauge Flechette / Heavy Sabot Slugs).
  • Secondary Weapon: Two-Handed Breaching Maul or Heavy Hydraulic Riot Shield.
  • Armor Configuration: Full Warlord Pattern Heavy Exosuit or Titan Ballistic Plate (Piercing & Blunt Resistances ≥ 70).
ACTION POINT ROTATION

Aggressive Room Breach Cycle

  1. Step 1 (Door Breach): Kick open reinforced blast doors without hesitation. Even if three enemies are pre-aimed at the threshold, incoming gunfire cannot stun Max.
  2. Step 2 (Damage Absorption): Heavy armor mitigates 70%+ of kinetic trauma; critical hits are halved; zero Action Points are lost to pain shock.
  3. Step 3 (Point-Blank Slaughter): Spend 1 AP closing to point-blank range, then 1 AP firing the Taiga-24 drum shotgun. Wide-angle 12g buckshot/flechettes dismember multiple clustered targets.
  4. Step 4 (Pharmaceutical Overdrive): Pop Morphine or Combat Stimulants as needed; Blood Filtration locks toxicity at 0%, preventing fatal respiratory collapse.

Failure Recovery & Armor Maintenance

Heavy power armor loses defensive durability under continuous bullet impacts. If your armor condition degrades below 40%, incoming bullets begin penetrating for substantial damage:

  • Step behind structural cover or retreat into an already cleared corridor.
  • Right-click to seal the blast door, preventing chasing enemies from maintaining visual lock.
  • Spend 1 turn using a Nanite Solder kit or Specialist Armor Repair kit to restore durability before re-engaging.

High-Velocity Kinetic Evasion

Build 3: The Agile Shadow Assassin (High-Dodge Striker)

The ultimate speed-farming and sabotage build, exploiting Patch 1.0.4 precision dodge calculations and reworked sprint interactions to outrun enemy crossfire.

CORE SPECIFICATION

Operative & Loadout Blueprint

  • Operative: Hannah “Domino” Reich (Reworked *Agile*: movement in any direction grants dodge stacks; interacts with doors/lockers while sprinting).
  • Class: Tunnel Rats or Co.B.R.A (Mobile Firearm Accuracy) / Eclipse Blades.
  • Key Implants: Sprint Hydraulics (Thigh/Foot slots — +20% sprint traversal speed) + Silent Step Soles.
  • Primary Weapon: MP-50 High-Velocity SMG loaded with Shavara Hollow-Point / RIP cartridges (+75% flesh trauma).
  • Secondary Weapon: High-Frequency Monomolecular Dagger (Armor-ignoring slashing damage).
  • Armor Configuration: Ultra-Light Infiltration Bodysuit (<8kg total carried weight, preserving 0.0kg encumbrance penalties).
ACTION POINT ROTATION

Continuous Motion & Sprint-Looting Cycle

  1. Step 1 (Perpetual Sprint Stance): Maintain Sprint stance at all times (+10% base movement speed, low AP traversal).
  2. Step 2 (Evasion Stacking): Moving across tiles in any direction immediately triggers Agile dodge stacks, driving composite evasion to 50% – 60%. Six out of ten incoming rounds miss completely.
  3. Step 3 (Seamless Looting): Open doors, hack consoles, and retrieve quest items without exiting sprint or wasting AP on stance toggles.
  4. Step 4 (Flesh Shredding Burst): Dump rapid bursts of Shavara RIP ammunition into unarmored enemies for immediate limb amputations and catastrophic bleedouts.

The Environmental Dodge Trap

Dodge does not work against area-of-effect hazards: Flamethrower napalm carpets, thermal laser sweeps, and toxic gas clouds bypass evasion entirely. When confronting Sunlight Corp incendiary units or Venusian acid spitters:

  • Immediately halt sprint and equip a sealed Hazmat component or Gas Mask.
  • Engage from maximum range using corner-peeking tactics rather than rushing through burning floor tiles.

Bramfatura Dimensional Mastery

Build 4: The Demonic Overlord (Corruption & Summoner)

A high-level occult specialist build that inverts the Quasimorphosis threat, turning dimensional corruption, demon flesh consumption, and Baron incursions into weapons of mass destruction.

CORE SPECIFICATION

Operative & Loadout Blueprint

  • Operative: Isabella Garcia (Innate 100% immunity to septic infection, rot, and gangrene) or Maximilian Rohr.
  • Class: Golem Squad or Bramfatura Cultist / Ritualism (Pact Efficiency & Demonic Damage).
  • Key Implants: Gavvakh Stomach (+35% universal damage upon ingesting raw demon organs) + Steps of Grigenchosach (100% poison & acid immunity).
  • Primary Weapon: Entropy Projector / Void Needle or Heavy Semi-Auto Slug Shotgun.
  • Active Pacts: Slain Baron Summoning Pacts (Summoning demonic minion frontlines to absorb corporate gunfire).
  • Armor Configuration: Hybrid Hazmat-Ballistic Plate (Fire & Cold resistances ≥ 40 to ensure high Entropy resistance).
CORRUPTION MECHANICS EXPLOITATION

Exploiting the 1,299 Bane Cap & 25-Turn Cataclysm Window

  1. Step 1 (Deliberate Corruption Spikes): Slay enemies rapidly and consume Gavvakh to spike the station's Q-meter past 1,000, deliberately triggering Ecstasy and Baron incursions.
  2. Step 2 (The 1,299 Bane Ceiling): In Steam 1.0, enemy stat scaling hits a hard ceiling at 1,299 Bane points. Enemies stop gaining additional health or damage, allowing your demonic pacts and scaling damage buffs to overtake them.
  3. Step 3 (The 25-Turn Cataclysm Window): The Autumn Sale Hotfix lengthened Baron Cataclysm cooldowns from 12 to 25 turns. When a Baron spawns, bait their opening cast, then unleash your summoned minions to shred them during the predictable 25-turn recovery window.
  4. Step 4 (Gavvakh Feast): Ingest fallen demon flesh with the Gavvakh Stomach to restore massive hit points and trigger +35% universal damage buffs without vomiting.

Extraction Quasimorphosis Purge

Before boarding the extraction shuttle, your operative's Quasimorphosis level must be controlled to prevent sudden post-mission mutations. Keep 2 bottles of Purified Water or 1 vial of Sorbent in your shuttle reserves to purge systemic corruption immediately after mission completion.

Tactical Comparison

Meta Builds Comparison Matrix

Evaluate the four meta builds across mission compatibility, survival ratings, and logistics resource costs:

Build Archetype Primary Operative Optimal Mission Types High-Skull Survivability Logistics / Economy Cost
The Hallway Eraser Victoria Boudicca Conquest, Espionage, Open Station Clearing 9.5 / 10 (Range) Moderate (7.97mm Ammo Consumption)
The Immortal Juggernaut Maximilian Rohr Defense, Elimination, Enclosed Vault Breaches 10 / 10 (Stun Proof) High (Power Armor Durability & 12g Shells)
The Agile Shadow Assassin Hannah Reich Sabotage, Timed Extractions, Speed-Looting 8.5 / 10 (Evasion) Low (Light Armor, High Salvage Speed)
The Demonic Overlord Isabella Garcia Descent, High-Bane Venus Incursions, Boss Hunts 9.0 / 10 (Occult) Variable (Demonic Organs & Purge Sorbents)
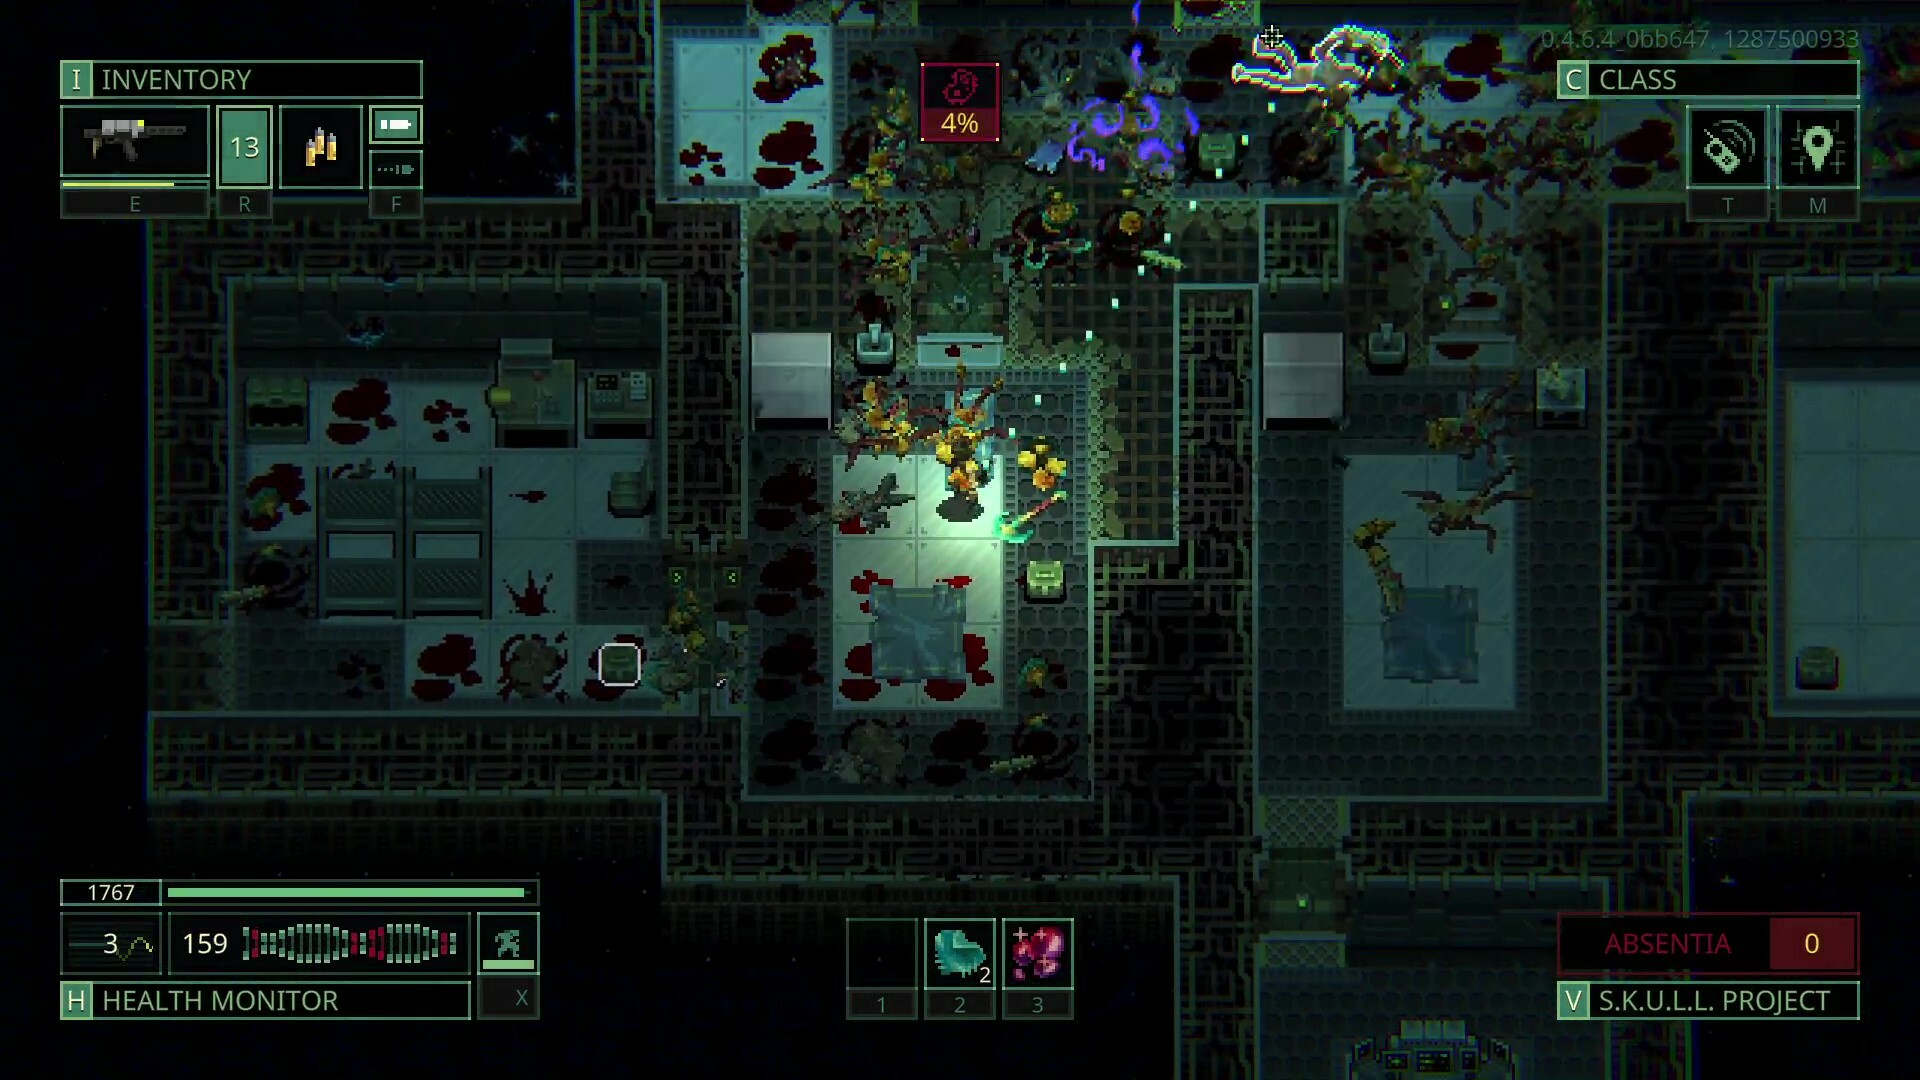
Quasimorph tactical loadout and combat weapon management
Official Patch 1.0.2 screenshot Official Steam 1.0 tactical interface: Balancing weapon calibers, ammunition variants, body armor condition, and tactical consumables before deployment. © Magnum Scriptum / HypeTrain Digital

Universal Principles

Action Point Economy & Universal Survival Rules

Regardless of which meta build you deploy, adhering to foundational Action Point (AP) discipline prevents disastrous party wipes.

GOLDEN RULES OF COMBAT

High-Win AP Habits

  • The 1-Turn Sidearm Swap: Never reload an empty primary under fire. Drawing a secondary sidearm or blade costs only 1 AP.
  • Doorway Right-Click Closure: When overwhelmed, step backward 1 tile and right-click the door to seal it, breaking line-of-fire.
  • Aim Before Firing: Spending 1 AP to Aim tightens your weapon's scatter cone, turning glancing hits into fatal headshots.
  • Weight Management: Keep excess weight below 15kg to prevent movement AP costs from doubling from 1 to 2 AP per tile.
FATAL TACTICAL BLUNDERS

Mistakes That Erase Clones

  • Opening Doors on Your Final AP: Stepping through a door with 0 AP remaining allows alerted enemies to execute a full turn against you.
  • Standing in Open Corridors: Corridors provide zero cover bonus. Always hug wall recesses or doorway corners.
  • Ignoring Weapon Condition: Firing weapons below 50% durability causes frequent weapon jams, costing an entire turn to clear.
  • Pure Ballistic Stacking: Wearing heavy armor with 0 Fire resistance makes you instant prey for hostile flamethrowers.

Video Field Intel

Neyreyan: Quasimorph Meta Builds & Loadout Synergies

Watch in-depth gameplay testing, weapon calibrations, and combat rotation breakdowns by veteran mercenary Neyreyan:

Detailed testing of end-game weapon loadouts, armor setups, and combat rotations in Steam 1.0.

Player blocked or saving data?

This optional privacy-enhanced player loads only after you press play. If it is blocked, continue with the written guide on this page.

Field FAQ

Frequently Asked Questions

Which meta build is the safest for surviving high-skull corporate defense missions?

The Immortal Juggernaut build featuring Maximilian 'Max' Rohr and the Tunnel Rats class is the most reliable setup for high-skull contracts. By combining Max's innate 'Feel No Pain' trait (100% immune to pain shock stun and -50% critical damage received) with heavy composite power armor and the Taiga-24 automatic shotgun, your operative can breach rooms, absorb incoming fire without losing Action Points, and eliminate clustered enemies in a single turn.

How does the Hallway Eraser build eliminate enemies without triggering reaction fire?

The Hallway Eraser relies on the synergy between Victoria Boudicca's trait (+2 weapon range, -2 enemy reaction radius) and the Eye of Rarrug ocular implant (8-tile X-ray vision through walls). By dropping into Sneak stance to eliminate scatter, Victoria can spot hostile patrols through steel bulkheads and fire high-penetration 7.97mm AP ammunition from 12 to 14 tiles away, well outside the AI's 8 to 10 tile reaction detection cone.

Does the Agile Shadow Assassin build protect against flamethrowers and poison puddles?

No. Hannah Reich's reworked Agile evasion achieves 50% to 60% dodge while in motion, which deflects incoming ballistic bullets, shotgun pellets, and melee strikes. However, wide-area environmental hazards such as flamethrower fire carpets, thermal beam sweeps, and acid puddles bypass dodge entirely. When confronting fire-heavy factions like Sunlight Corp or Tezctlan sorcerers, you must maintain distance and equip thermal-resistant hazmat components.

How does the Demonic Overlord build exploit the 1,299 Bane cap and 25-turn Cataclysm cooldown?

In Steam 1.0, Quasimorphic entity stat inflation ceases completely once the station reaches the 1,299 Bane point hard ceiling. Furthermore, the Autumn Sale Hotfix increased the enemy Baron Cataclysm pact cooldown from 12 to 25 turns (+108% safety window). This allows the Demonic Overlord to deliberately spike the corruption meter, summon high-tier demonic minions, and shred bosses during the predictable 25-turn casting downtime while consuming fallen demon flesh with the Gavvakh Stomach for universal damage boosts.

How should I manage weapon reload Action Point expenditure during intense firefights?

Unmodified heavy weapons require 3 full Action Points (turns) to reload, leaving your operative completely exposed. For high-intensity combat, either prioritize the Magnum shuttle workbench calibration to reduce reload times to 1 turn, or adhere to the sidearm discipline: drawing a pre-loaded secondary weapon or high-tier monomolecular blade costs only 1 AP, allowing you to neutralize immediate threats before retreating behind closed doors to reload safely.
References

  1. Steam 1.0 release announcementofficial announcement · checked 2026-08-13
  2. Steam Autumn Sale Hotfix notesofficial announcement · checked 2026-10-18